
This is the basic setup and configuration for most of the TP-Link Routers. Although for some models it may vary, about 90% of TP-Link Routers have the same configuration.
Make sure that you follow every step carefully. Let’s get started!
For Cable/Fiber Modem:
- Connect your PC to the TP-Link Router using a LAN/Ethernet cable.
- Open your Web Browser.
- Type in the Default Gateway Address. The default gateway address varies for each router model, so, you can find it on the label below it or head to http://tplinkwifi.net.
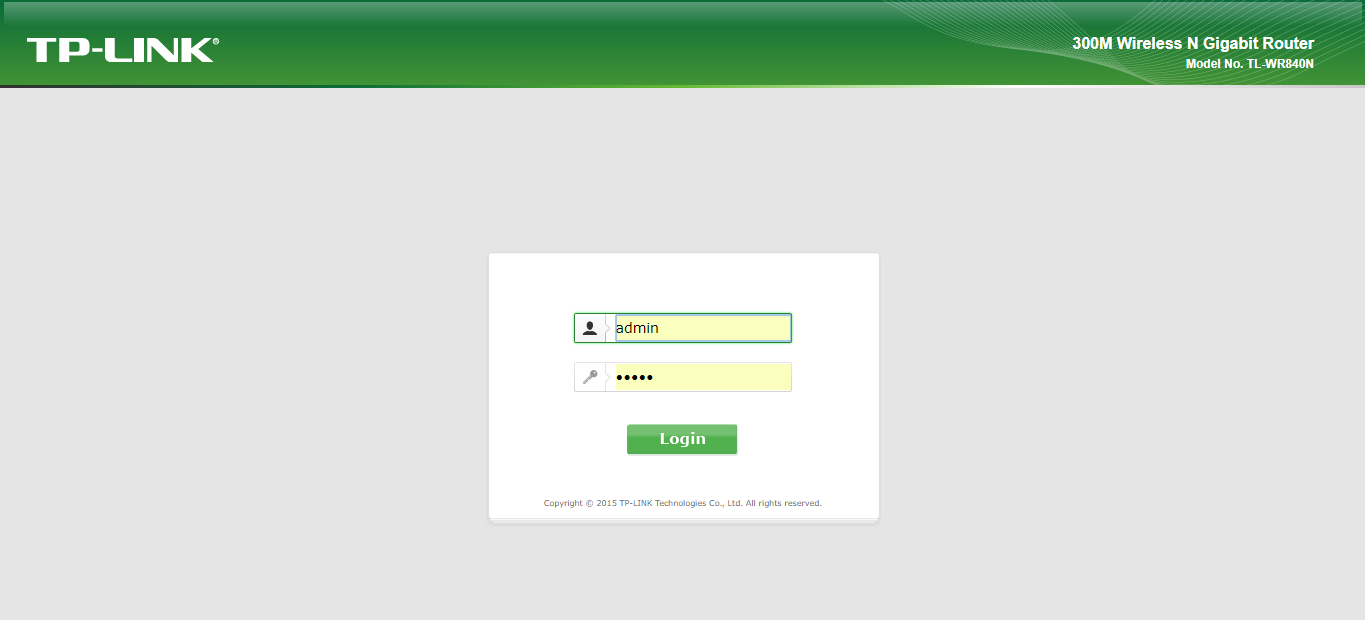
- The default username and password is “admin”.
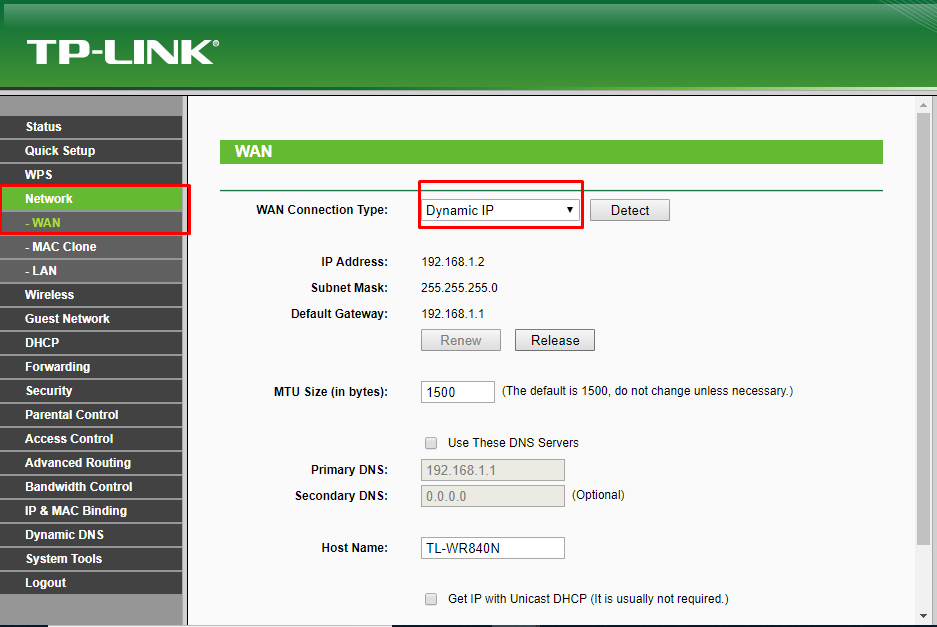
- If your connection is Dynamic IP (Cable/Fiber), go to Network > WAN > Dynamic IP.
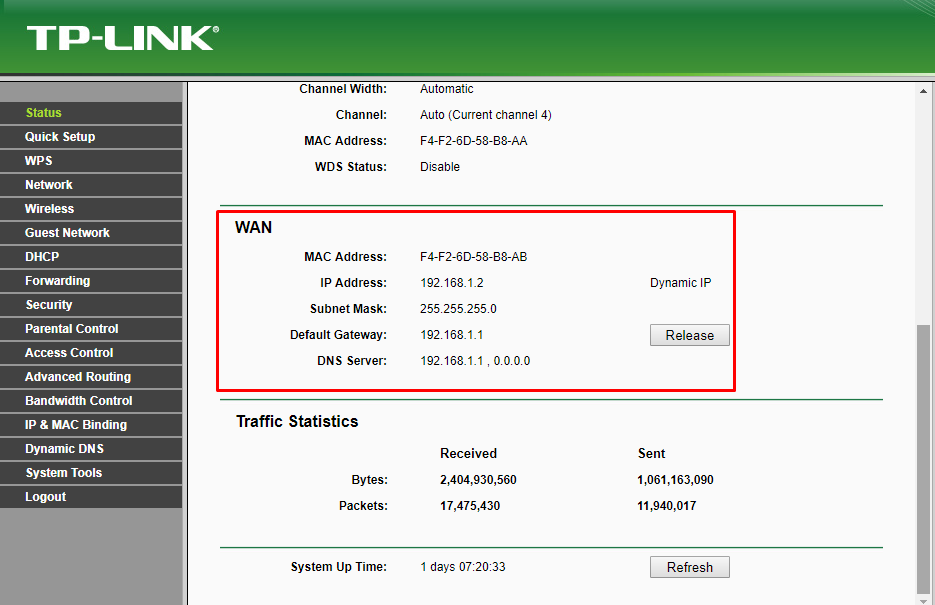
- After a few minutes, check the status page. If it shows IP addresses as shown then the setup is complete. If not, proceed to next step.
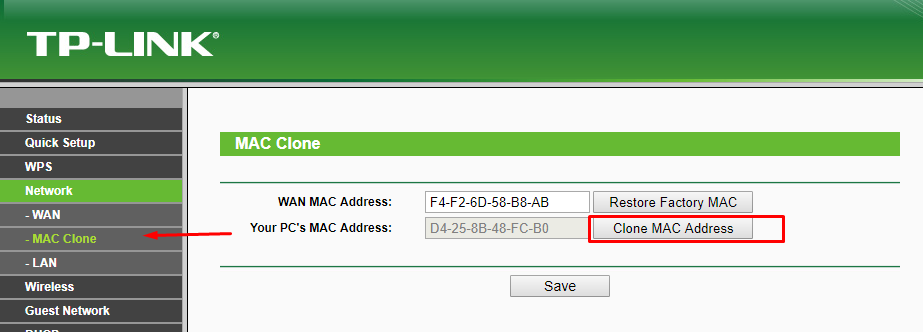
- Go to Network > MAC Clone > Clone MAC Address.
- Check the status page, if it still doesn’t show IP addresses, try rebooting your router. It will fix the issue.
For DSL Modem (PPPoE):
- Connect your PC to the TP-Link Router using a LAN/Ethernet cable.
- Open your Web Browser.
- Type in the Default Gateway Address. The default gateway address varies for each router model, so, you can find it on the label below it or head to http://tplinkwifi.net.
- The default username and password is “admin”.
- If your connection is PPPoE (DSL Modem), go to Network > WAN > PPPoE.
- Type in the username and password provided by your ISP.
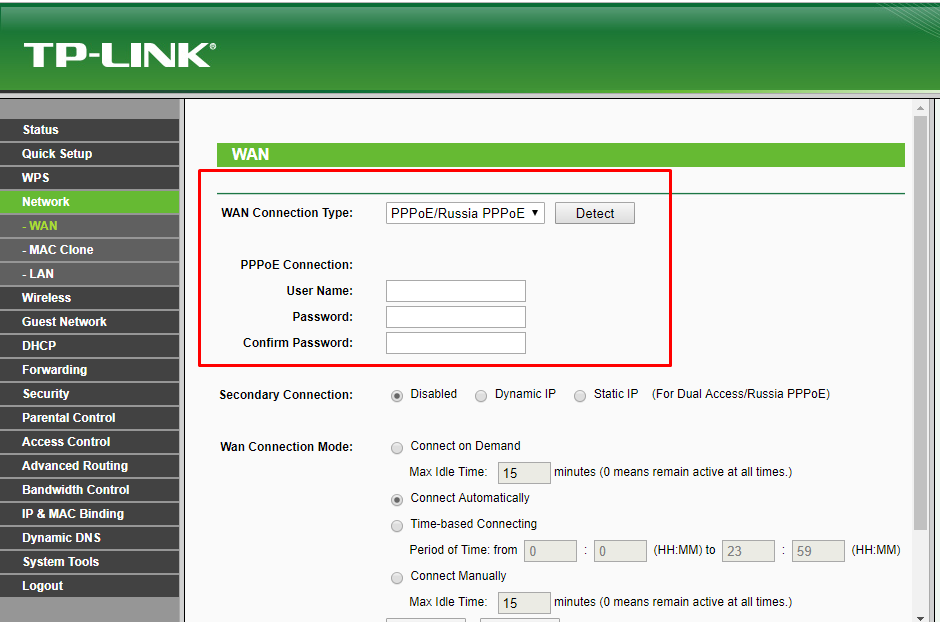
- Click on Save.
- After a few minutes, check the status page. If it shows IP addresses as shown then the setup is complete. If not, proceed to next step.
- Check the status page, if it still doesn’t show IP addresses, try rebooting your router. It will fix the issue.