This is the basic setup and configuration for most of the NETGEAR Routers. Although for some models it may vary, about 90% of NETGEAR Routers have the same configuration.
Make sure that you follow every step carefully. Let’s get started!
For Cable/Fiber Modem:
- Connect your PC to the NETGEAR Router using a LAN/Ethernet cable.
- Open your Web Browser.
- Type in the Default Gateway Address. The default gateway address for NETGEAR routers is http://192.168.0.1 or http://192.168.1.1. Head to http://routerlogin.net.
- You will be asked to log in into your router. Enter login credentials. For NETGEAR routers, the default username is admin and the default password is password.
- Click on Setup Wizard.

[Source: NETGEAR] - Select Yes and then click on Next.
- The Setup Wizard will detect your internet connection service. If your connection is Cable Internet, it will detect it as Dynamic IP.
- Click on Next.

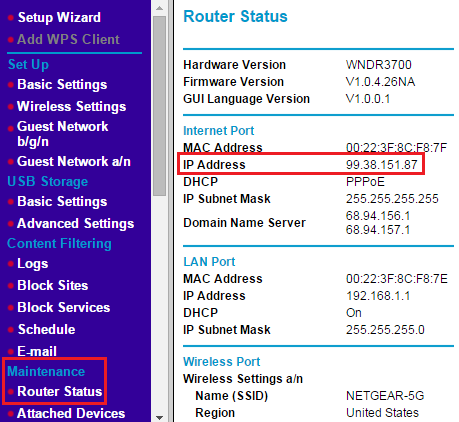
[Source: NETGEAR] - To check the status, Go to Maintenance > Router Status.

[Source: NETGEAR] - If it is not blank or filled with zeroes e.g 0.0.0.0. then the router configuration is completed.
For DSL Modem (PPPoE):
- Connect your PC to the NETGEAR Router using a LAN/Ethernet cable.
- Open your Web Browser.
- Type in the Default Gateway Address. The default gateway address for NETGEAR routers is http://192.168.0.1 or http://192.168.1.1. Head to http://routerlogin.net.
- You will be asked to log in into your router. Enter login credentials. For NETGEAR routers, the default username is admin and the default password is password.
- Click on Internet tab.
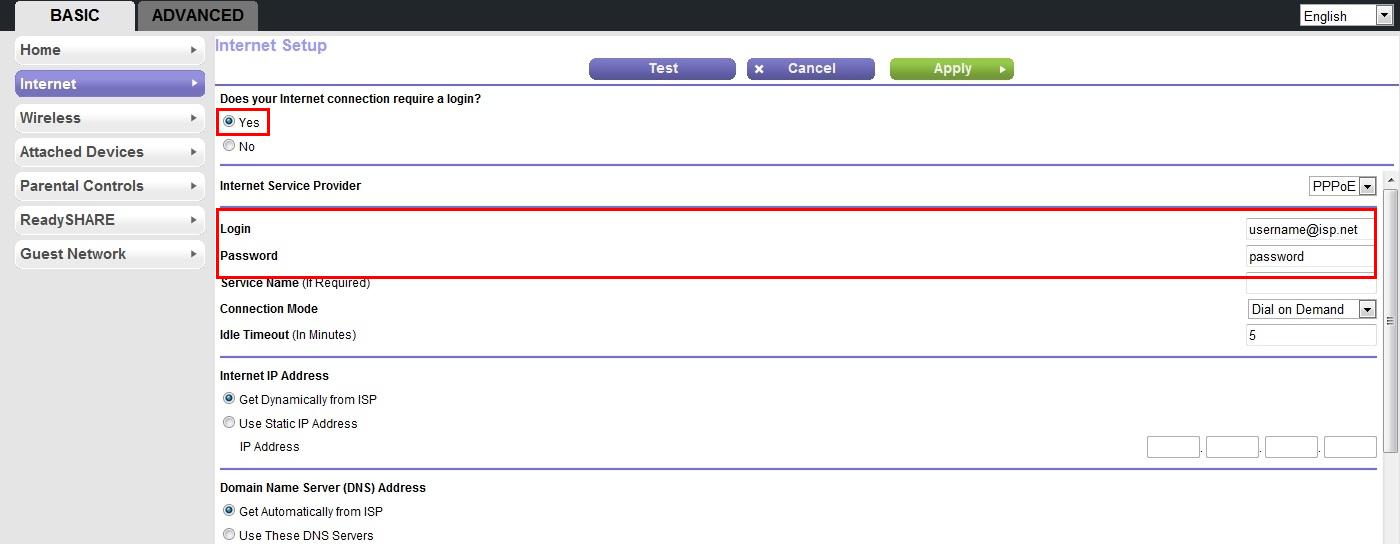
- Select Yes for “Does your internet connection requires a login?“.
- Click on the drop-down arrow under ISP(Internet Service Provider) and select PPPoE.

[Source: NETGEAR] - Provide the username and password given by your ISP and click Apply.
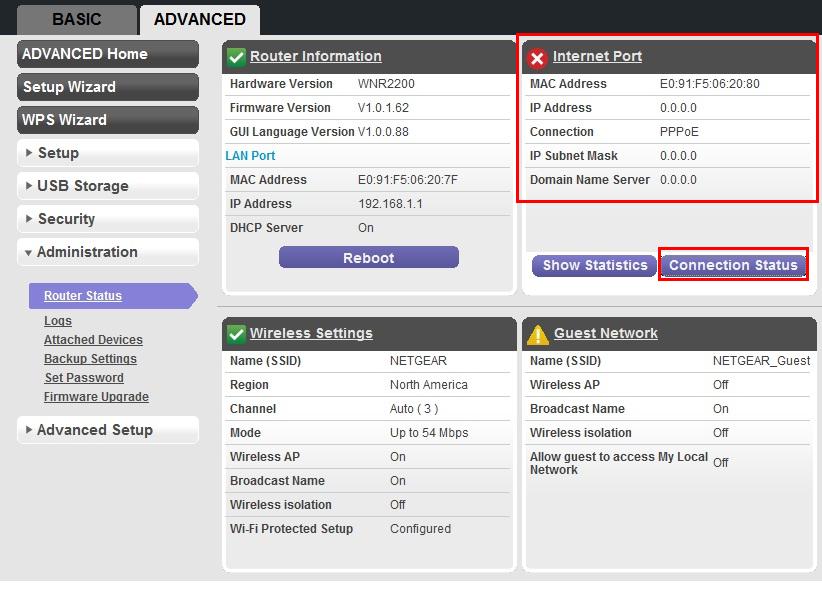
- To check the status, Go to Advanced > Administration > Router Status.
- If it shows any IP address instead of 0.0.0.0 then your configuration and setup is complete.

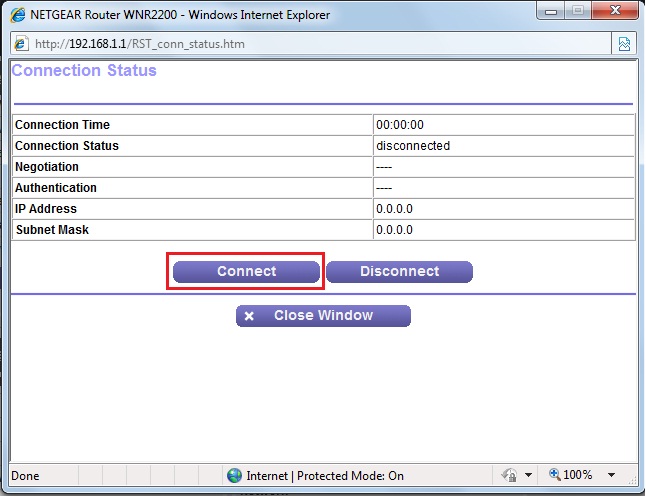
[Source: NETGEAR] - If it is showing 0.0.0.0, then click on Connection Status and then Connect.

[Source: NETGEAR] - The connection will now be established.
